To create a template, follow these steps:
- Go to the side menu.
- Select the “Templates” section.
- Click on the “New template” option.
Template Creation Interface
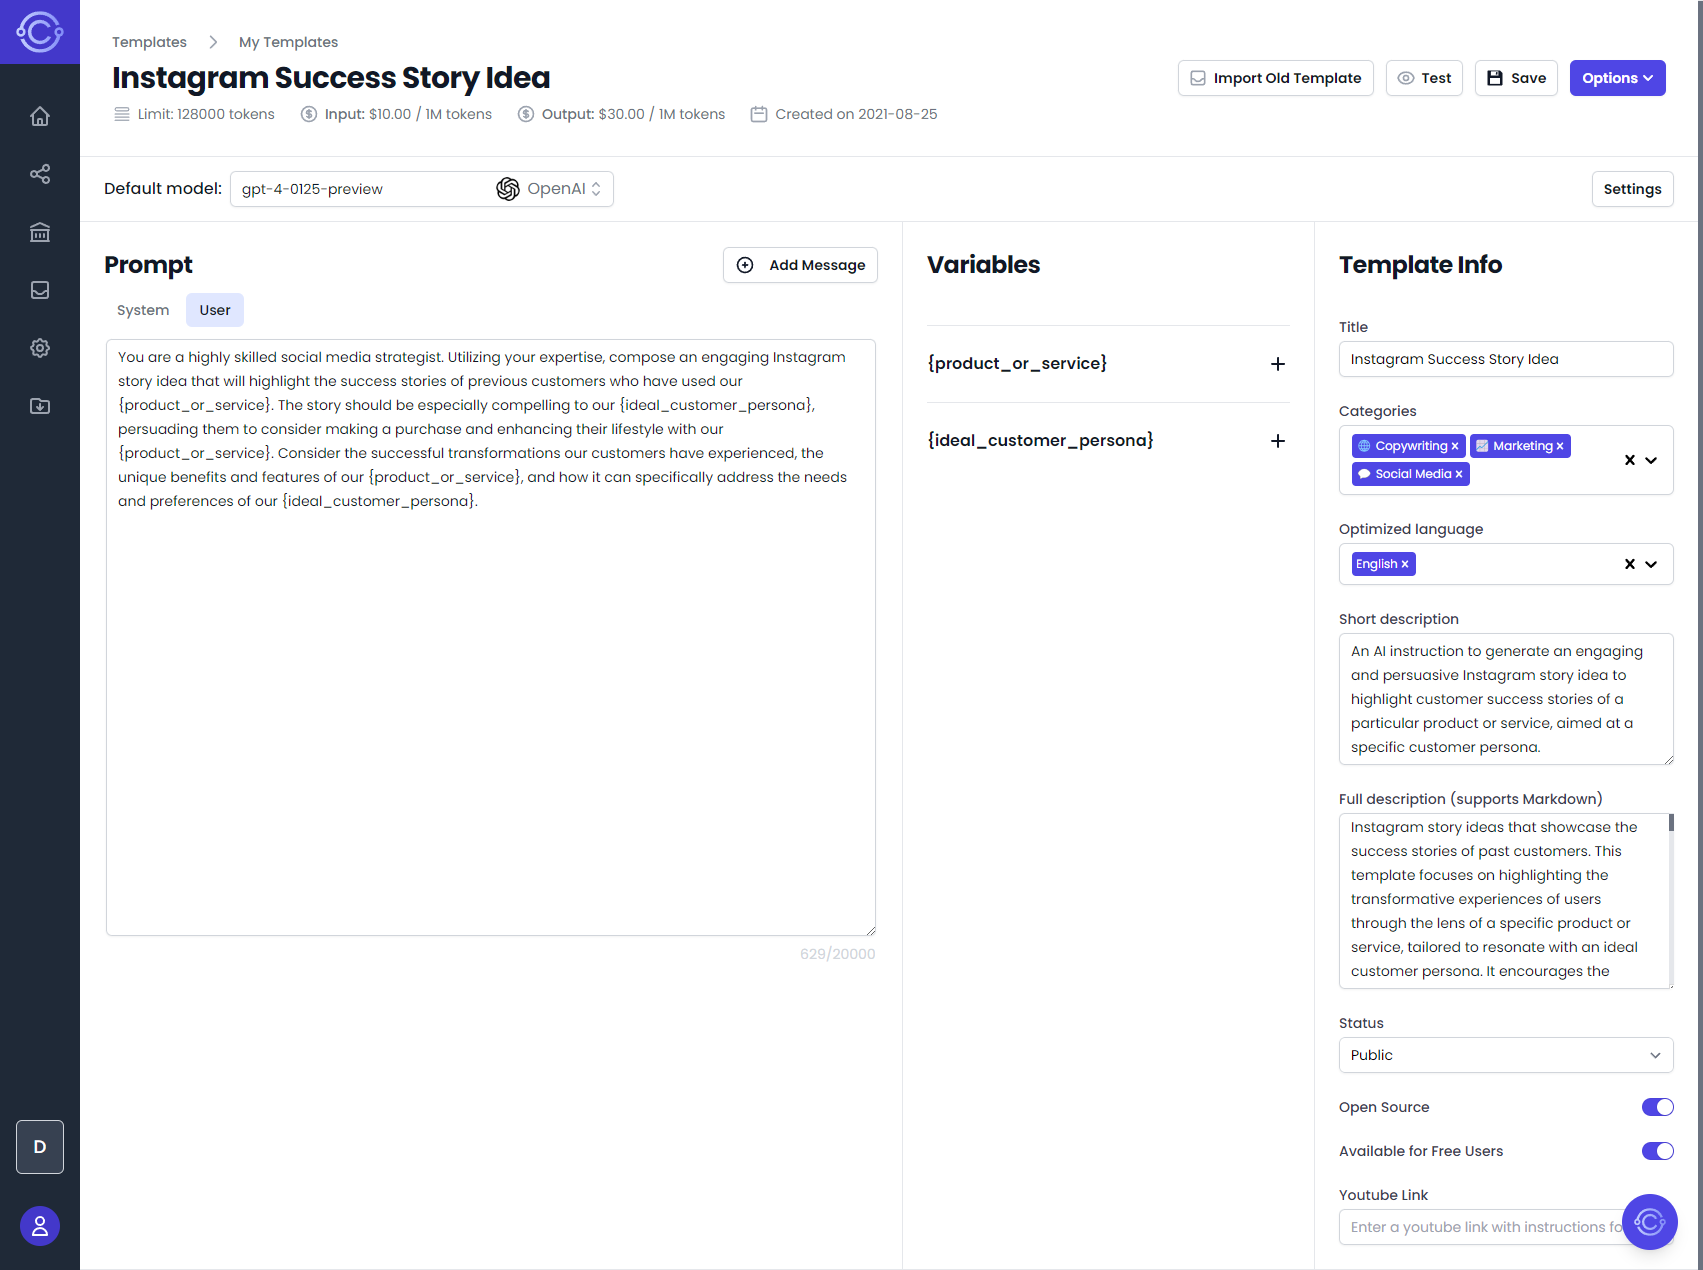
The template creation interface has 4 sections:
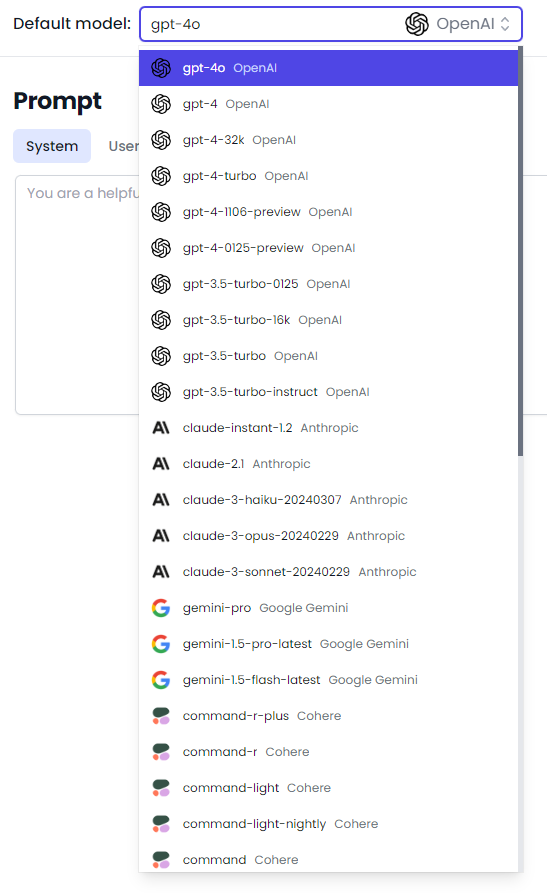
Default Model
This value indicates the default AI model that will run the template. The model chosen at this point can be changed at the time of execution; however, its choice determines the type of prompt the template will use.
Prompt
Here you will add the instructions to the AI for the template. Depending on the chosen model, the prompt configuration will be different:
Chat Model:
You will have two fields to complete:
- System Field: Provides the basic instructions to the AI.
- User Field: Adds specific instructions.
Completion Model:
For example, the gpt-3.5-turbo-instruct model from OpenAI. You will only have one field available to add the complete prompt.
For prompts to be valid, they must include at least one variable in brackets. These variables will be the inputs that the user will enter when executing the prompt. For example:
You are a highly skilled social media strategist. Utilizing your expertise, compose an engaging Instagram story idea that will highlight the success stories of previous customers who have used our {product_or_service}. The story should be especially compelling to our {ideal_customer_persona}, persuading them to consider making a purchase and enhancing their lifestyle with our {product_or_service}. Consider the successful transformations our customers have experienced, the unique benefits and features of our {product_or_service}, and how it can specifically address the needs and preferences of our {ideal_customer_persona}.
Variables
In this section, you will find the variables indicated in the prompt, which you can customize according to your needs. For the previous example, the variables are:
- product_or_service
- ideal_customer_persona
You can find more information about the types of variables in their dedicated section.
Template Information
Here we will add the template details:
- Title: The template title.
- Categories: Assign the template to the available categories.
- Language: Indicate the main language of the prompt.
- Short Description: Add a short description of the template to inform the user about what it does.
- Full Description: Explain in detail how the template works, and add examples or usage instructions. Supports Markdown format.
- Status:
- Private: Only available to you.
- Public: Can be used by the community.
- Draft: Will not be available for use.
- Open Source: Only available for public templates. If marked as Open Source, it will not only be available to all users, but it can also be duplicated (you will be able to see all the template content).
- Video Link: Optional, add an informative YouTube link about your template.
Testing and Saving the Template
Once all the fields are completed, you can test the functionality of the template with the “Test” button. You can compare the functionality of the template with multiple models at the same time.

If everything is correct, save the template for use.


